Before recording a screencast, you have to choose the target platform. YouTube is a great way to get started since it serves videos at zero bandwidth cost. Each platform has its preferred aspect ratio and resolution for video uploads. YouTube's default aspect ratio is 16:9, i.e., the pixel ratio of width to height in your final video should be 16:9. The following table shows recommended resolutions for YouTube:
| Name | Alternate name | Resolution |
|---|---|---|
| 4K | 2160p | 3840 by 2160 |
| Quad HD | 1440p | 2560 by 1440 |
| Full HD | 1080p | 1920 by 1080 |
| HD | 720p | 1280 by 720 |
You can refer to a video as Full HD if its aspect ratio is 16:9 with a resolution of at least 1920 by 1080. The resolution can be higher, e.g., a resolution of 2304 by 1296 is higher than Full HD but falls short of Quad HD.
A coding screencast should be at least Full HD to ensure that the code is crisp and easy to read.
Scaled resolution vs. actual resolution
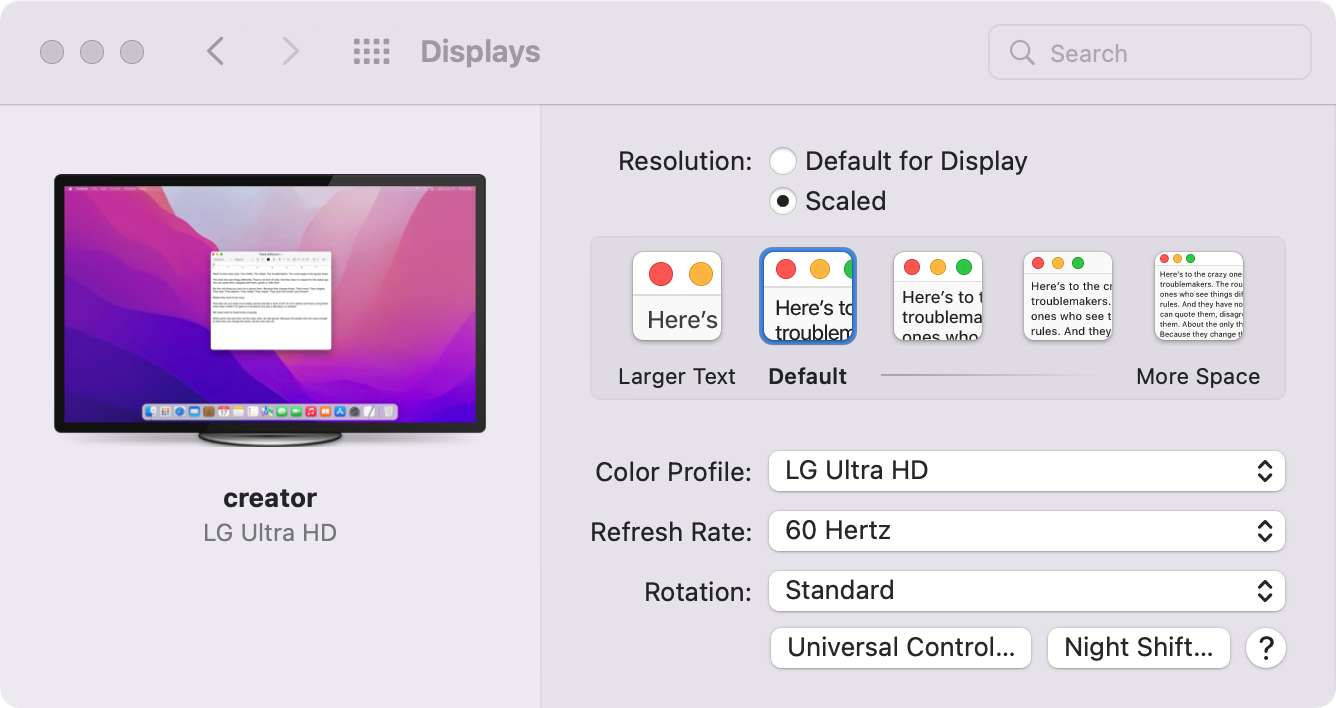
When you record on a HiDPI display, you must understand the difference between scaled and actual resolution. I record on the affordable LG Ultra HD 24UD58-B. Its resolution in physical pixels is 3840 by 2160. If macOS used this resolution, fonts would appear tiny and hard to read. So, macOS uses a scaled resolution, which for the LG Ultra HD defaults to 1920 by 1080.
One pixel of the scaled resolution corresponds to multiple physical pixels. On the LG Ultra HD with 1920 by 1080 scaled resolution, every width or height pixel is replaced with two actual width or height pixels. The ratio between scaled and actual width/height pixels is called the device pixel ratio (DPR). In this example, DPR is 2. For DPR 2, one scaled pixel consists of four actual pixels, as shown in this graphic:
MacOS always uses the default resolution unless you opt for a different scaled resolution:
Depending on which scaled resolution you choose, you get a different DPR. DPR does not have to be an integer:
| Resolution | DPR | Description |
|---|---|---|
| 3840 by 2160 | 1 | Actual resolution (More Space). |
| 2560 by 1440 | 1.5 | Scaled Quad HD. |
| 1920 by 1080 | 2 | Scaled Full HD (Default). |
Applications can use actual pixels instead of scaled pixels for parts of the screen, which is why photos and videos look crisp on HiDPI displays. It's almost as if an application has more pixels up its sleeve, which it can use when it makes sense.
Why DPR matters for screen recording
In this article, egghead.io explains how to record a screencast. The article states that egghead.io serves videos in Full HD (1920 by 1080). But they recommend recording at 1280 by 720 (in HiDPI mode), which sounds contradictory.
Some screen recorders record actual pixels, not scaled pixels. They capture 2560 by 1440 actual pixels when you record 1280 by 720. The captured resolution is Quad HD, but you need more for 4K. Here are some examples of screen recorders that capture actual pixels: QuickTime, ScreenFlow and Cleanshot X.
To serve 4K videos, you must record 1920 by 1080 scaled resolution. With DPR 2, actual pixels for width and height double, resulting in a 3840 by 2160 for the final video. On my LG Ultra HD, I have to record the entire screen.
When you choose a screen recorder, verify that it supports HiDPI displays and records actual pixels instead of scaled pixels.
Mind the aspect ratio on MacBooks
If you do not have an external HiDPI display, you can record a screencast on your MacBook's Retina display. On my MacBook Air M1, the aspect ratio is 16:10 and not 16:9. As of macOS 12.4, there is no way to set a 16:9 resolution for the built-in display. The other surprise is that the DPR of the default scaled resolution is 2560/1440 = 16/9 = 1.7777778 (less than 2):
| Resolution | DPR | Description |
|---|---|---|
| 2560 by 1600 | 1 | Actual resolution. |
| 1440 by 900 | 16/9 | Default scaled resolution. |
To record a 16:9 screencast on a MacBook Air M1 with default scaled resolution, you have two options:
- Record 1280 by 720 portion: With DPR 16/9, the resolution of the recording would be 2275 by 1280, which is less than what you get when you record on the LG Ultra HD but still better than Full HD.
- Record 1440 by 810 portion: This is the largest 16:9 area that fits on the MacBook Air M1 built-in display (using default scaled resolution). With DPR 16/9, the resolution of the recording would be 2560 by 1440 (Quad HD, but not 4K). Hence, on a MacBook Air M1's built-in display, you cannot record a 4K screencast.
When you record a portion of your screen, you must place and size windows inside the recording area. I manage windows with Raycast's window management extension, which makes placing windows on a desktop a breeze. But, window placement is relative to the entire desktop, and thus, window managers are not suitable for placing windows inside a recording area.
Record full screen 16:9 on a MacBook's built-in display
Many screencast creators prefer recording the entire screen, as this Twitter thread shows. With my LG Ultra HD, it is no problem to record 16:9 full screen. But when you record on the built-in 16:10 MacBook display, macOS does not allow you to change the resolution to a 16:9 ratio. But you can always connect to an external display with a different resolution and mirror it to your built-in display.
BetterDummy can do this virtually. It lets you create a 16:9 dummy display and mirror it to your built-in display. You can then record 16:9 full screen on the mirrored dummy screen.